Sunday, 27 October 2019

Exp_Animation_04

황금비율을 활용한 패턴 디자인

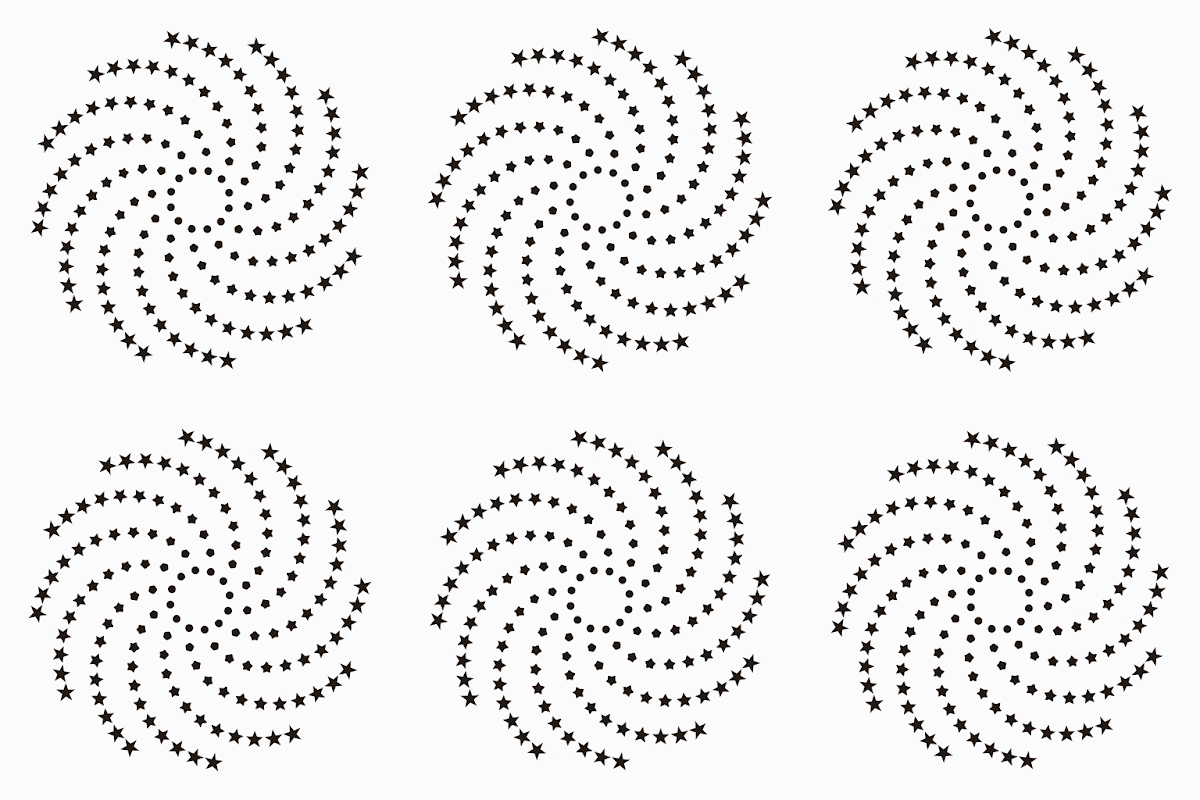
황금비율을 활용한 패턴을 디자인하고자 다양한 시도를 진행하였다. 진행한 결과 1초에 137.5, 250, 1650번 돌렸을 경우 다음과 같은 패턴들이 나타났으나 뚜렸한 패턴에 대한 결과를 찾지 못하였다.

Pattern design using the Golden Ratio

Various attempts were made to design patterns using the golden ratio. As a result, when 137.5, 250, 1650 turns in 1 second, the following pattern appeared, but the result was not found.


Wednesday, 23 October 2019

Exp_Code_03

모터의 속도를 숨으로 조절하기 위한 코드를 작성하였고 이는 가변저항을 활용한 코드와 숨 코드 두개를 합쳐 만들었다.

I wrote code to control the speed of the motor by breath, which was made by combining the code with variable resistor and the breath code.

Control the speed of the motor by breath (숨으로 속도조절을 위한 코드)

const int dirPin = 4;
const int stepPin = 5;
const int enablePin = 6;
const int MQ135 = A0;
int SensorVal = 0;
int customDelay, customDelayMapped;
void setup()
{
  Serial.begin(9600);
  pinMode(enablePin, OUTPUT);
  pinMode(stepPin, OUTPUT);
  pinMode(dirPin, OUTPUT);
  digitalWrite(enablePin, LOW);
  digitalWrite(dirPin, HIGH);
}
void loop() {
  customDelayMapped = speedUP();
  digitalWrite(stepPin, HIGH);
  delayMicroseconds(customDelayMapped);
  digitalWrite(stepPin, LOW);
  delayMicroseconds(customDelayMapped);
}
int speedUP() {
  int customDelay = analogRead(A0);
  int newCustom = map(customDelay, 30, 400, 90, 1200);
  return newCustom;
}

Exp_Code_02

사람의 숨을 인식 할 수 있는 센서를 아두이노와 MQ150을 활용하여 제작하였고 코드는 다음과 같다.

A sensor that can recognize human breath is produced using Arduino and MQ150. The code is as follows.

Codes for Breath data( 숨 정보를 받아드리는 코드)

int MQ135 = A0;
int SensorVal = 0;
void setup() {
  Serial.begin(9600);
}
void loop() {
  mq135();
  delay(500);
}
void mq135(){
  int valor = analogRead(MQ135);
  Serial.println("Breath Tester");
  Serial.print(valor);
  Serial.println("ppm");
  delay(500);
}

Exp_Code_01

아두이노의 모터 속도를 조절하기 위한 코드를 작성하였다. 작성에는 이전의 작업 결과를 많이 참고하여 코딩을 작성하였다.

I wrote the code to control the Arduino's motor speed. Coding was written by referring to previous works done by other people.

Code for Controlling the Stepper Motor (모터 조절을 위한 코드) 

const int dirPin = 4;
const int stepPin = 5;
const int enablePin = 6;

int customDelay, customDelayMapped;

void setup()
{
  pinMode(enablePin, OUTPUT);
  pinMode(stepPin, OUTPUT);
  pinMode(dirPin, OUTPUT);
 
  digitalWrite(enablePin, LOW);
  digitalWrite(dirPin, HIGH);
}

void loop(){
  customDelayMapped = speedUP();
 
  digitalWrite(stepPin, HIGH);
  delayMicroseconds(customDelayMapped);
  digitalWrite(stepPin, LOW);
  delayMicroseconds(customDelayMapped);
}

int speedUP(){
  int customDelay = analogRead(A0);
  int newCustom = map(customDelay, 0, 1023, 300, 4000);
 
  return newCustom;
}

Sunday, 13 October 2019

Exp_Animation_03

'우리가 Zoetrope을 볼 수 있는 이유는 물체가 빛을 받아 그 물체에서 빛을 반사하기 때문에 보인다면, 만약 물체를 거치지 않고 빛만을 활용한 Zoetrope을 제작하면 어떨까'에 대한 생각에서 시작되었다. 첫 실험으로는 매우 간단한 형태 변형인 사각형에서 원형으로 바뀌는 형태를 만들어보았다.

'We can see the Zoetrope because the object receives light and reflects light from the object.' What if I can make a Zoetrope that uses only light without going through the object?' In the first experiment, made a form that changes from square to circle, which is a very simple form transformation.


Animation

만든 애니메이션을 토대로 레이저커팅을 실행하였고 커팅된 무늬에 모터를 연결하여 돌렸다. 돌고 있는 원판에 1분당 불빛을 720번 켰다 끔을 반복하였으며 1차 실험의 결과는 다음과 같다.

Based on the animation made, laser cutting and connected the motor to the cut pattern. The light was turned on and turned off 720 times per minute. The results of the first experiment were as follows.

Lazer Cutting


그 이후 통과는 물질들을 활용하여 Zoetrope의 무늬들이 어떻게 나타나는지를 살펴보았다.

After that, I have watched how Zoetrope's patterns appeared using transparent materials.


Monday, 7 October 2019

Exp_Animation_02


 이번에 Zoetrope에 다양한 디자인을 만들기 위해 여러가지의 실험을 진행하였다. 지난 학기에 제작되었던 12 Frame을 원형상에 나열하는 형태가 아닌 나선으로 프레임들을 위치시켰다. 이는 형태가 안에서 밖으로 또는 밖에서 안으로 들어오는 형태로 나타나았다.

다음으로 안에 들어가는 이미지 디자인을 제작하였다. 박스의 형태, 화살표의 형태, 파티클의 형태 그리고 마지막으로 3D Morph를 활용한 변형형태를 제작하였다.

12Frame으로 영상을 제작하였으며 이는 12hrz의 속도로 빛을 쏘는 것과 같은 개념이다. 또한 속도는 1초에 한바퀴, 두바퀴[30RPM, 60RPM]으로 실험을 진행하였다.

This time, Zoetrope conducted various experiments to make various designs. The frames were placed in a spiral rather than a circular arrangement of 12 frames. This is shown as the form coming in from the inside out or the outside in.

Next, I created an image design that fits inside. We created the shape of the box, the shape of the arrow, the shape of the particles, and finally the deformation using 3D Morph.

I made a video with 12 frames, which is the same concept as shooting light at a speed of 12hrz. In addition, the speed was conducted in one second, one-two wheels [30RPM, 60RPM].


Box Mirror


Arrow_Animation


Particle Animation

3D Animation

Morph_Animation

Wednesday, 2 October 2019

Exp_Physical_01

보급형 선풍기를 활용한 Zoetrope 제작

다이소에서 흔히 구할 수 있는 보급형 선풍기를 활용하여 보급형 Zoetrope을 제작하기 위해 선풍기의 도는 속도를 조절해야했어야했다.

선풍기의 속도를 조절하기 위해 저항값을 활용하였으나 2000원 짜리 성풍기의 모터가 속도조절을 하기에 너무 예민했다. 속도가 너무 빠르거나 돌지를 않았다. 이에 몇 저항값까지 선풍기가 조절이 가능한지를 실험하기 위해 브래드보드에 저항값 10옴씩 추가하여 돌지 않을 때가지의 최대 저항값을 구하였다. 이에 2000원짜리 다이소 선풍기는 저항값 70옴까지 갈 수 있었으며 15,000\ 선풍기는 저항값 130옴까지 받을 수 있었다.

Zoetrope production using entry-level fans

In order to make a popular Zoetrope using the popular fans available at Daiso, it was necessary to adjust the fan's turning speed.

The resistance value was used to control the speed of the fan, but the motor of the 2000 won fan was too sensitive to control the speed. It was too fast or did not spin. In order to test how much resistance the electric fan can be adjusted, the resistance value was added to the breadboard by 10 ohms, and the maximum resistance value until it did not turn was calculated. The 2000\ Daiso fan could reach 70 ohms and the 15,000 \ fan could reach 130 ohms.


그러나 미세한 속도조절이 필요한 작업인지라 이를 해결하기 위해 세운상가에 필요한 저항을 구매하기 위해 갔으나 뜻 밖의 도움을 받았다. 저항값을 추가한다고 미세한 조절은 불가능하며 다음과 같은 회로도를 제작해야한다고 조언을 받았다.

However, because it is a work that requires fine speed adjustment, I went to buy a resistor for Sewoon Shopping Center to solve this problem, but received unexpected help. It was advised that adding a resistance value would not allow fine adjustment and make the following schematic.